Hey there, pattern creators!
Today, we're diving into one of the most fundamental yet powerful features of our app, customizing your canvas background.
A great background can set the entire mood for your design, making your patterns pop and giving them a professional, polished look. Whether you want a simple solid color, a trendy gradient, or a full-blown custom image, we've got you covered.
Let's get started!
Method 1: The Background Panel
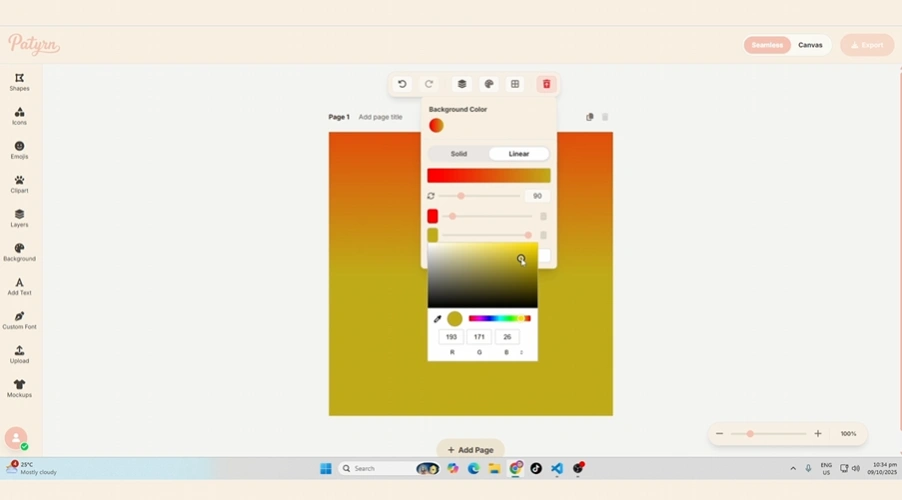
The most direct way to control your background is through the dedicated "Background" panel, which gives you access to all the settings in one place.
1. Find and Open the Panel
On the vertical toolbar on the left side of your screen, look for the icon that looks like a painter's palette . This is your Background button. Click it to open the panel and reveal your options.
2. Choosing a Background Color
Your first option is to set a background color. This is perfect for setting a simple, clean stage for your pattern elements.
Method 2: Using a Background Image
Sometimes, a color just isn't enough. Patyrn allows you to use your own images as a canvas background, opening up a world of creative possibilities.
1. Upload Your Image
In the Background panel, click the " Upload" button. This will open your computer's file browser. Select any image you want to use.
2. Adjust Your Image
Once uploaded, your image will appear on the canvas, and a new "Image Settings" section will pop up in the panel. From here, you can fine-tune its appearance:
3. Removing the Image
Changed your mind? No problem. Just click the trash can icon next to the "Upload" button to remove the background image. Your previously selected background color will reappear.
Pro Tip: The Double-Click Shortcut
For an even faster and more interactive workflow, you can enter a special Background Editing Mode.
Conclusion
And that's it! You now have all the tools you need to create the perfect backdrop for your seamless patterns. Whether you're setting a simple mood with color or creating a complex scene with an image, mastering the background controls is a key step toward making your designs truly unique.
Happy Creating