Hey there, pattern creators!
Welcome back to the Patyrn blog! In our last tutorial, we covered mastering your canvas background. Today, we're diving into another feature that can dramatically elevate your designs: custom fonts.
Typography is a cornerstone of design. The right font can convey a mood, strengthen your brand identity, and make your text-based patterns truly one-of-a-kind. While Patyrn comes loaded with a huge library of fantastic fonts, the ability to upload your own opens up a whole new level of creative freedom.
This feature is part of the Creator's Asset Pack, so if you're a Pro user, let's get you started!
Step 1: Open the Custom Font Manager
Your journey begins on the left-hand toolbar. Look for the "Custom Font" button, which has a fountain pen nib icon
Clicking this button will open the Manage Custom Fonts modal. This is your central hub for uploading new fonts and managing the ones you've already added.
Step 2: Upload Your Font File
Inside the modal, you'll see the "Add New Font" section.
Find Your Font File: First, you'll need a font file on your computer. Patyrn supports common font formats, including:
Select the File: Click the file input area (it will say "No file chosen" initially). This will open your computer's file browser. Navigate to and select the font file you wish to upload.
Upload: Once you've selected a valid file, the "Upload" button will become active. Click it. Patyrn will process the file, and if successful, you'll see it appear in the "Installed Fonts" list below.
That's it! Your font is now part of your personal Patyrn library.
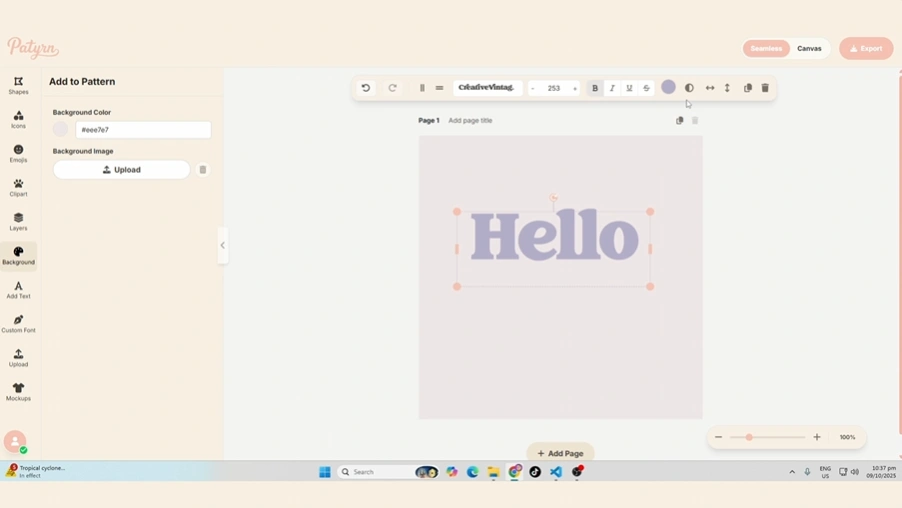
Step 3: Apply Your Custom Font
Now for the fun part! Using your newly uploaded font is just as easy as using any of the built-in ones.
Step 4: Manage Your Fonts
As you add more fonts, you may want to do some spring cleaning. The Custom Font Manager makes this simple.
A Quick Note on Font Licensing
Before you go on a font-uploading spree, it's important to touch on licensing. Many fonts, especially free ones found online, come with licenses that dictate how and where they can be used (e.g., personal vs. commercial use).
Please be sure you have the appropriate rights and licenses for any font you upload to Patyrn. You are responsible for adhering to the font designer's terms of use. Websites like Google Fonts and Font Squirrel are great resources for high-quality fonts that are often free for commercial use, but always double-check the license!
Conclusion
Custom fonts are a powerful tool for personalization and branding. By following these simple steps, you can expand your design toolkit and ensure your patterns speak in a voice that is uniquely yours.
Now go find some beautiful typefaces and happy designing